
Weekend project: your own self-hosted git server
23 Sep 2019 - John
I was working on my desktop computer the other day and my wife came in for a video conference. Since my keyboard is pretty noisy, she asked me to leave the room, so I had to push my code to a github repo so I could grab my laptop and pull from the other room. The problem is I’m very self conscious about my code and I don’t like to push incomplete code, especially from a project that is in a very early stage of development.

I ended up pushing to GitHub and then deleting the repo after cloning it on the other computer, but I kept wondering if there was a way to host my own git server locally. Turns out there is, and it’s pretty easy to do!
While GitHub certainly dominates the market, they’re not the only kids on the block, and this is where the awesome folks from GitLab come into play. They’re another competitor in the Git arena, but what sets them apart is that they offer a self-hosted package that you can use on whatever computer you have lying around, including the Raspberry pi! Let’s use one to build our server!
What we need:
- A Raspberry Pi, I went for the model B, 4gb version. I recommend going for the 4gb version because GitLab needs as much memory as you can give it.
- A case for it, I went for the Argon 40 neo, but any case will do.
- A power supply. It can be any brand, but it has to be USB-C and must be able to provide 3a at 5v. I went with the official one, but if your budget is tight, Canakit is a reputable brand that sells a compatible one for a bit cheaper.
- A micro SD card. I went for a 64gb one.
- OPTIONAL: If your computer does not have an sd card reader, you might want to get a cheap one.
All links are NON-AFFILIATE. Expect to spend around $100.
Let’s get going!
First we need to download all the necessary software. It’s not much:
- First we need Raspbian, which is a Linux distro for the Raspberry Pi based on Debian. Be sure to download the one called Buster Lite. The other two will also work, but they’re to be used on Rasperries attached to a monitor, which brings software that we won’t be using. When you’re done downloading it, extract it to any folder and you’ll end up with a .img file. This is the file we want.
- There are many methods for burning the image to the SD card. You could use Rufus on Windows or dd on Linux and Mac, but I will stick with BalenaEtcher since it offers a consistent way of doing it across platforms.
Flash the Raspbian image into the micro SD card
After you’re done with the downloads, plug the sd card into your your computer and launch BalenaEtcher. The way it works is you give it an image file (first button), a target device (your sd card) and then click on flash. You might get a warning if your SD is 64gb or bigger, just press ok and sit back. If asked, you will have to enter your admin password. You should see something like this:
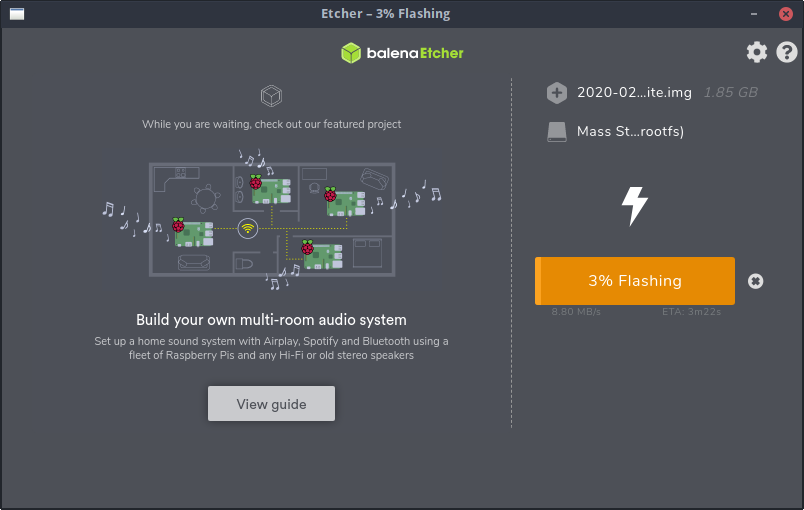
Just sit back and relax
After the flashing is done, do not eject your card. Instead, open a file browser and look for a /bootpartition. Inside, create an empty file called ssh with no extension and nothing inside. Since we’re not using a screen, we need a way to execute commands remotely, and this lets us do that.
Now we need to configure our wifi access. Still in the /boot partition, create a new file called wpa_supplicant.conf. Inside, add the following:
country=US
ctrl_interface=DIR=/var/run/wpa_supplicant GROUP=netdev
update_config=1

network={
    ssid="YOUR WIFI NETWORK NAME"
    psk="YOUR WIFI NETWORK PASSWORD"
}
Don’t worry about leaving your wifi password on a plaintext file. The information on this file is going to be used for configuration when you boot the Pi for the first time and then it’ll go away.
If everything went well, this is what your /boot partition should look like:
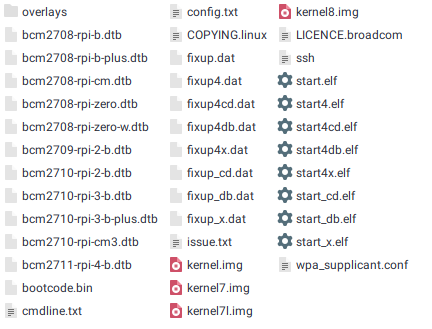
Success!
You can now eject the card, plug it into the Pi and turn it on.
Reaching the Pi through the network
This is the trickiest part of the project. You now need to locate the Pi on your network. The easiest way is to look at its IP on your wifi router’s client list and work with the ip address. However, you should look into Avahi for Linux or Bonjour for Windows and Mac, since it will allow you to use names like http://raspberry.local instead of having to find the IP address by hand. Check here if you’re on Ubuntu and here if you’re on Archlinux. Windows users will want to check here and Mac users should be already set up. The rest of this guide will assume your pi can be reached by typing raspberry.local.
With that out of the way, launch a terminal window and enter ssh pi@raspberrypi.local. You will get a notice about the hosts’ authenticity, just type yes and press enter to add its fingerprint to the list of know hosts. you’ll then be asked for a password, which is raspberry. Once you press enter, you’ll be dropped back to the console, but with a twist. This is NOT your computers terminal, but the Pi’s. Any command you enter in this prompt, gets executed in your Raspberry. It should look like this:
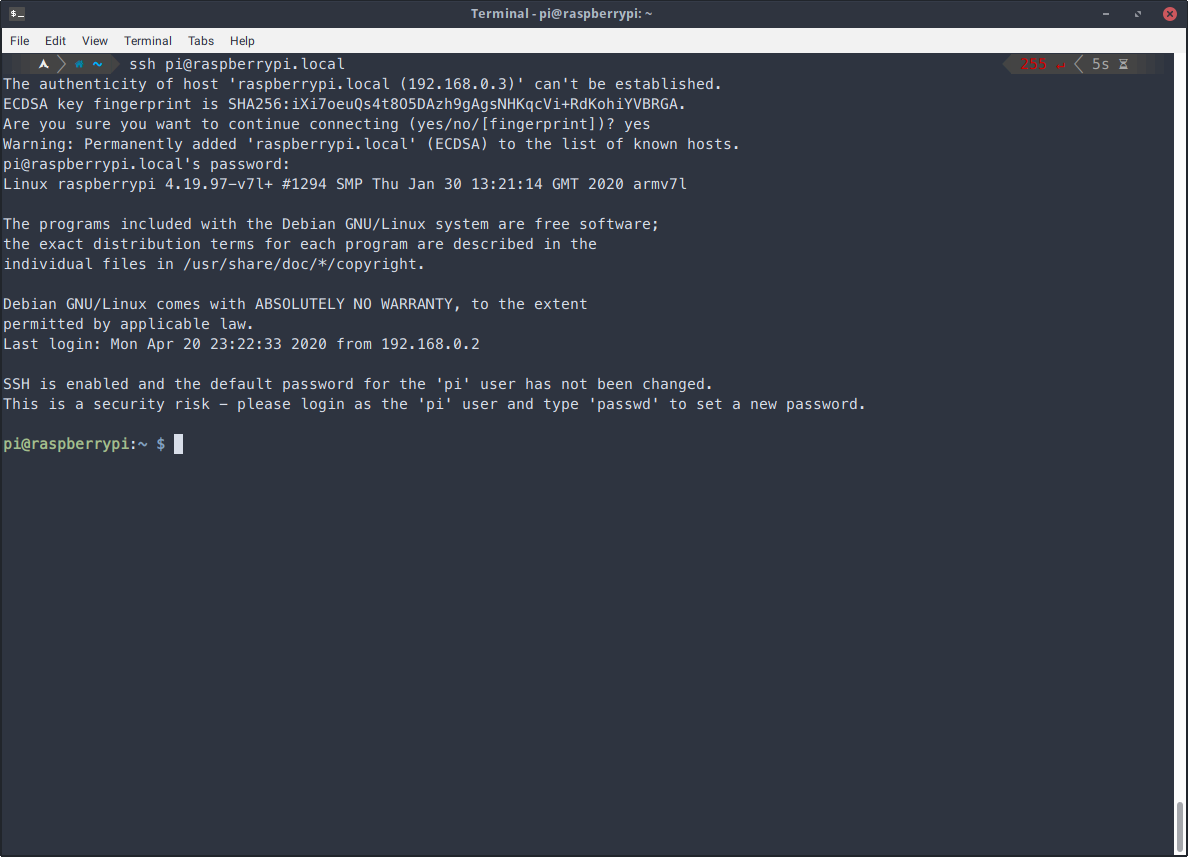
Morpheus, We’re in!
We also get a warning about the default password. Let’s take care of that. Enter sudo raspi-config and you’ll be taken to a screen that looks like this:
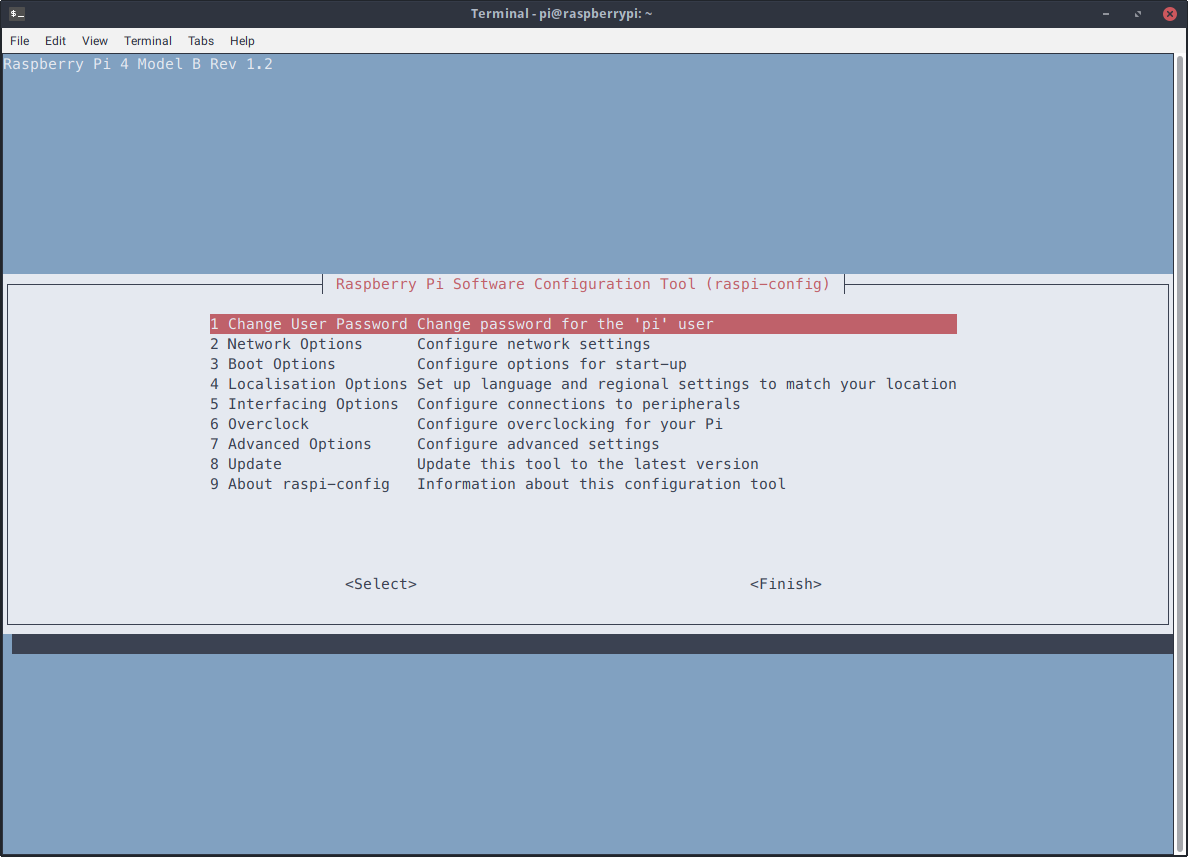
raspi-config in action
The first thing to do is change the default password so go ahead and press enter, then follow the prompts and enter a new password twice. Then on network options, change the hostname to something else you like. Since we’re going to be using this Pi for a GitLab instance, I’m naming mine gitlab, all lowercase. Note that whatever you put here will be the local address to the Pi, so I’ll name mine gitlab, which will be available at gitlab.local.
When you’re done with the hostname, go to the advanced options and press enter on Expand filesystem. When we flashed the raspbian image into the SD card, it made a partition that was just the size of the image, roughly ~300mb. By expanding the filesystem, we ensure to use all the space available in the SD card.
After this, press the right arrow to select finish and say yes when it asks to reboot. Your terminal will drop out of the ssh and kick you back to your actual computer’s terminal. Wait a couple of minutes for the Pi to reboot, and then ssh back into it, but this time with your hostname, so it would be something like:
ssh pi@yourNewHostName.localIf you get a warning about possible DNS spoofing, just enter
ssh-keygen -R yourNewHostName.localand try again. The reason that happened is because you donwnloaded a fingerprint for host X, but you changed its name, now you want to connect to host Y and it has the same fingerprint? SSH suspects foul play, so you have to delete the older fingerprint and accept the new one.
Remember to also use the new password!
As a last step before installing GitLab, we need to make the swapfile a bit bigger than the measly 100mb default, so type
sudo nano /etc/dphys-swapfile
and change theconf_swapsize=100line so that it reads
CONF_SWAPSIZE=4096
then press Ctrl+O, enter and Ctrl+X to save and exit.
Installing GitLab
We’re finally ready to start the installation. Still in your ssh prompt, send the following command to download all we need:
curl -Lo gitlab-ce_12.9.4-ce.0_armhf.deb https://packages.gitlab.com/gitlab/raspberry-pi2/packages/raspbian/stretch/gitlab-ce_12.9.4-ce.0_armhf.deb/download.deb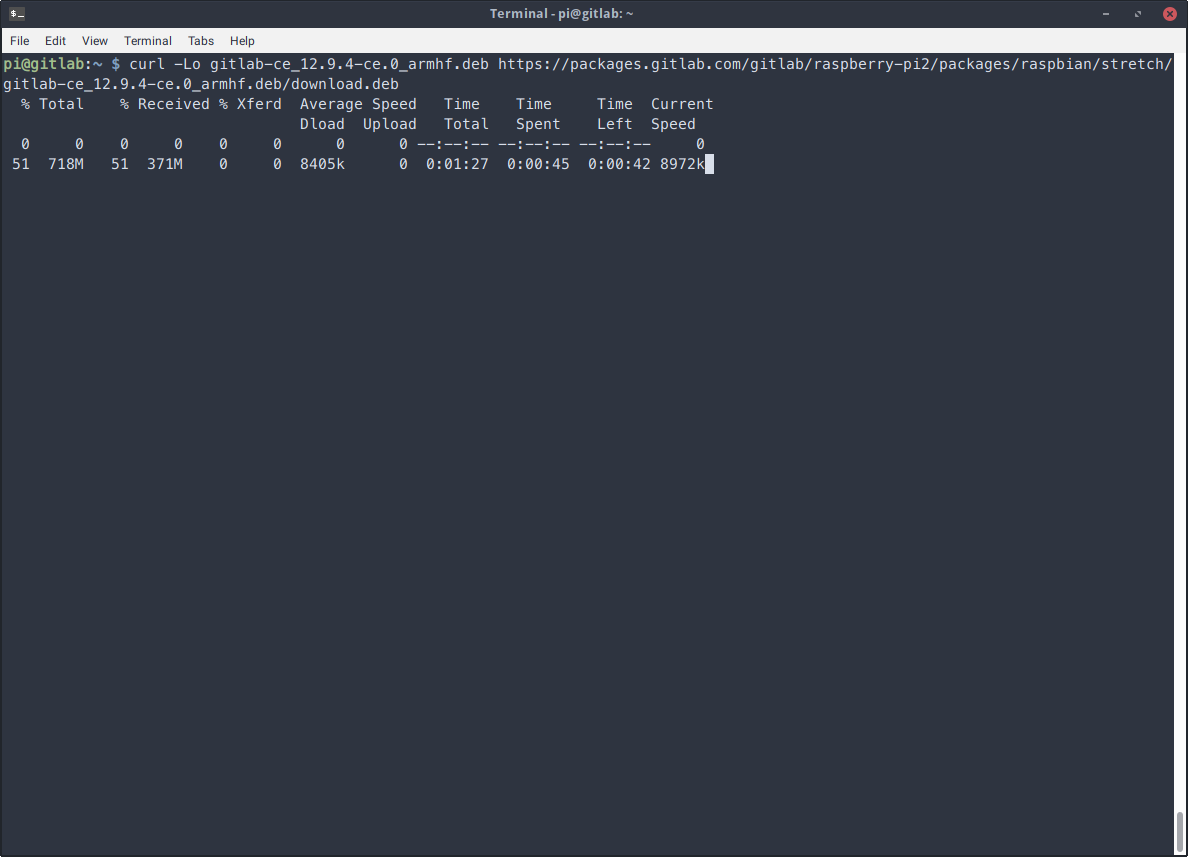
It’s a bit over 700mb so you might have to wait depending on your connection. After the download is over, proceed to install the package by issuing
sudo apt install ./gitlab-ce_12.9.4-ce.0_armhf.debRemember it was a 700+mb file compressed, so be patient because this one will take a bit longer. After it’s done installing, you’ll be greeted by GitLab and a warning about the hostname:
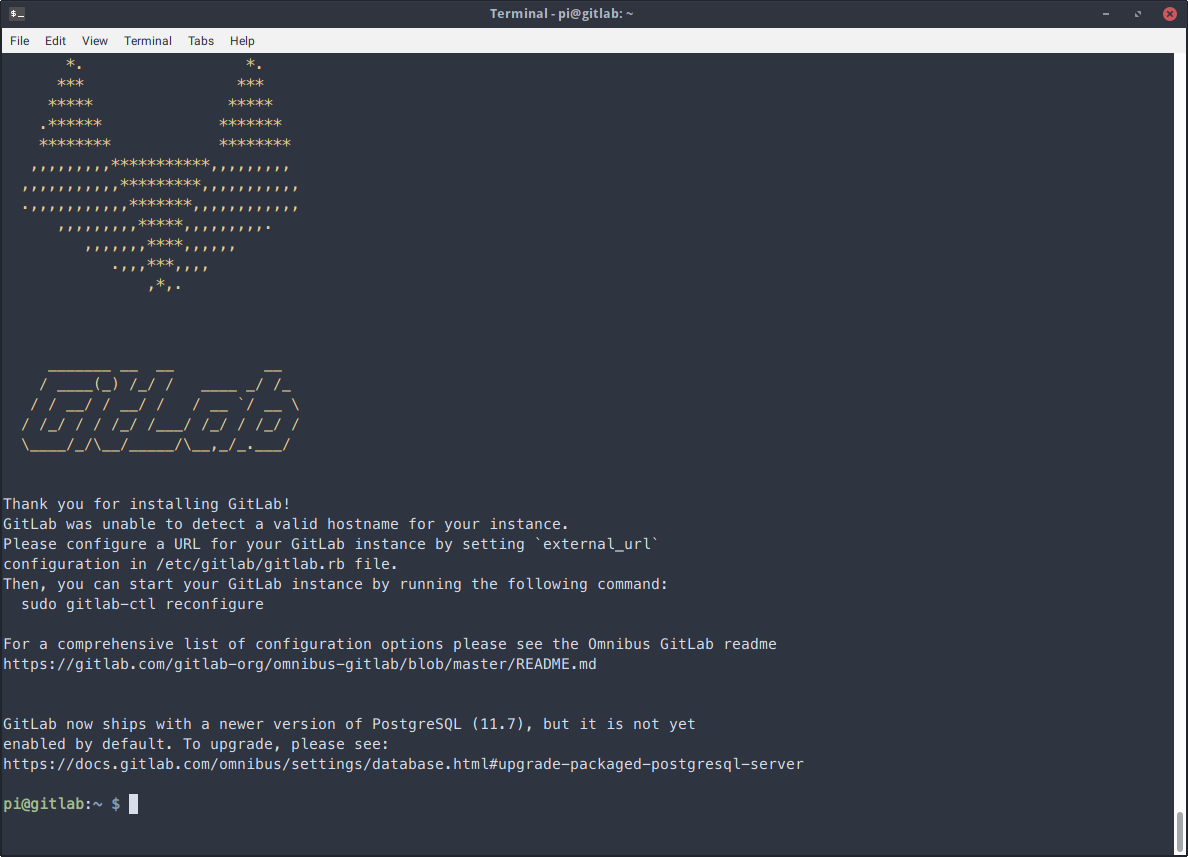
Let’s fix that. Enter
sudo nano /etc/gitlab/gitlab.rband there are a few things we need to change there:
First of all, the hostname. It’s set by default to http://gitlab.example.com, so we need to change the line to your personal .local address like so:
external_url 'http://yourNewHostName.local'Then on line 778 (at the time of this writing), uncomment the line that says
unicorn['worker_processes'] = 2Then on line 842 (again, at the time of this writing), uncomment the sidekiq concurrency directive and set it to 9:
sidekiq['concurrency'] = 9And finally, around line 1689, uncomment prometheus_monitoring and set it to false:
prometheus_monitoring['enable'] = falseAnd with this, our setup is done. Press Ctrl+O and enter to save and then Ctrl+X to exit nano. Then, back in the SSH console, enter
sudo gitlab-ctl reconfigureAnd wait. It takes about 5 minutes. Mine took 4:39. After it’s done, you can now enter exit on your SSH console and close your terminal. Now open your browser and visit gitlab.local or whatever you named your instance:
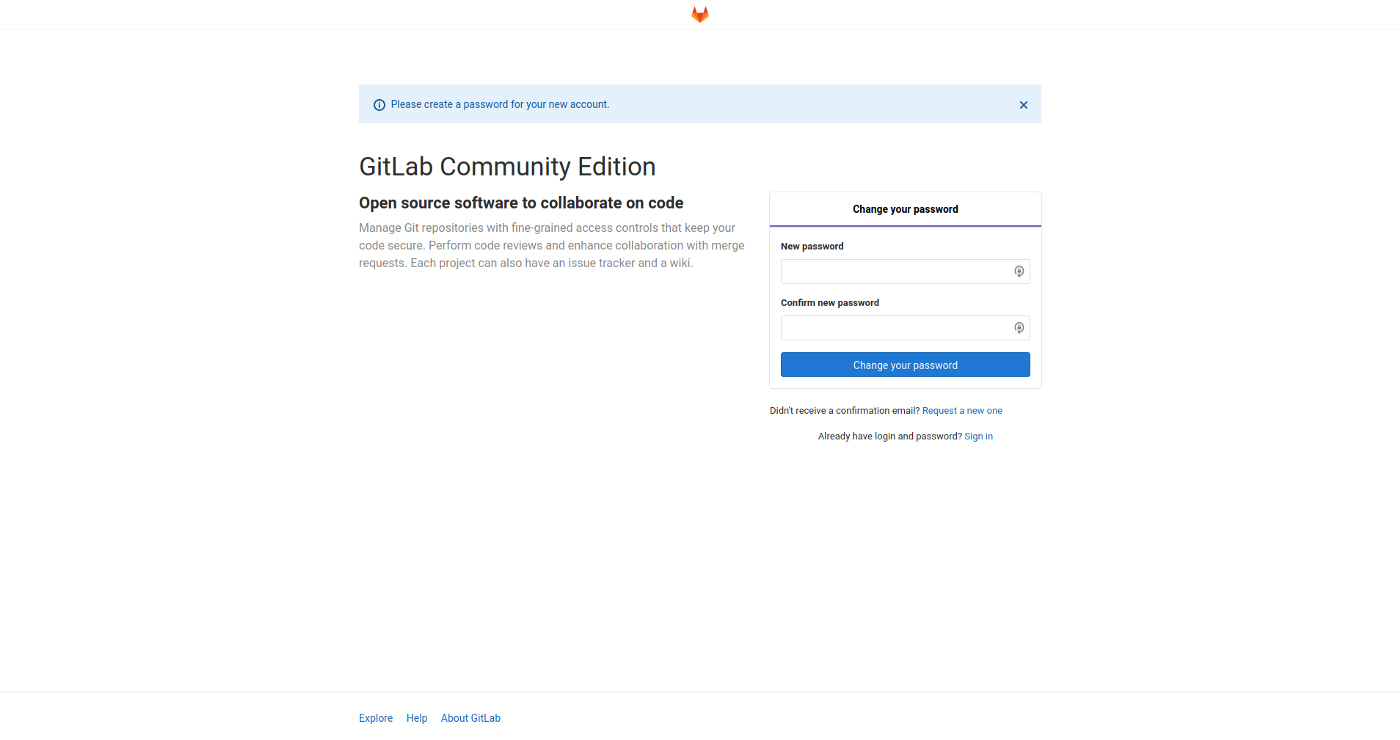
You will be prompted to set a new admin password (not the same as the Pi user password) and then you’ll be able to set a new account. After this, you’ll be in your very own GitLab server!
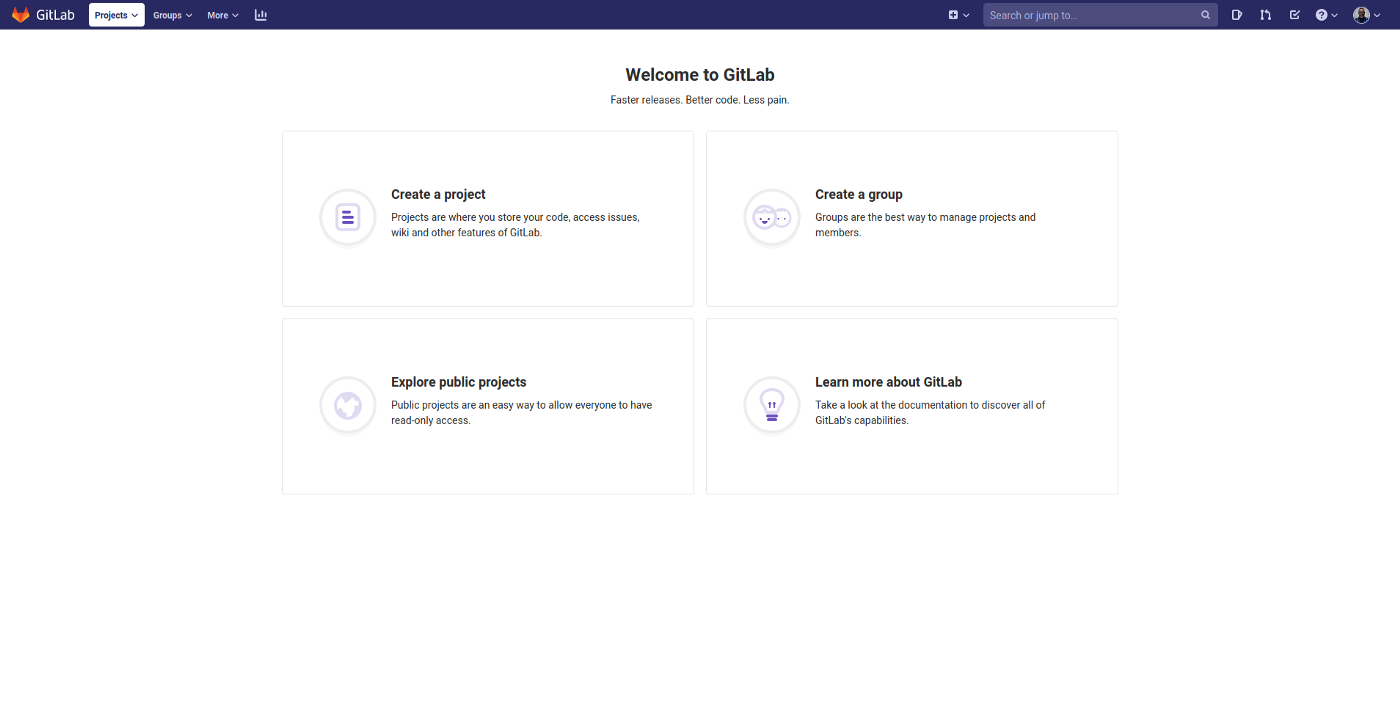
Congratulations, you’re done!